| Computer | |
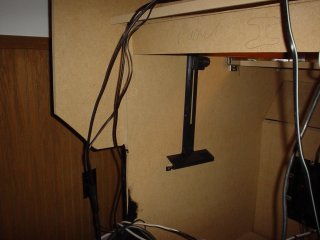 |
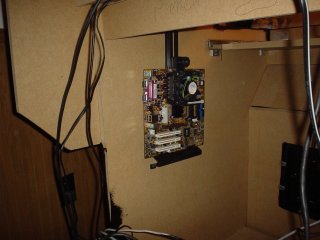
I mounted the motherboard holder from Happ Controls towards the top so I could be sure the S-Video cable would
reach the back of the TV. |
| Motherboard holder with the motherboard in. Very secure. |
 |
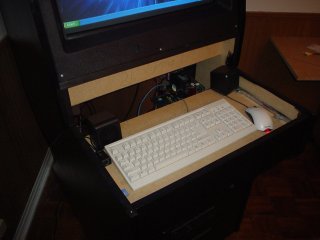 |
This is the keyboard and mouse in the keyboard drawer. I'm going to replace this mouse with a wireless one
tonight so I can sit at my computer desk and work the mouse. The speakers are here for the moment, but I'll be moving them
to above the monitor where they should be. I've also installed Windows XP and enabled Remote Desktop so I can make changes
that way without moving anyone out of the way. |
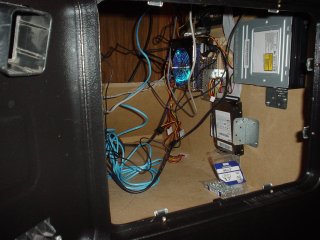
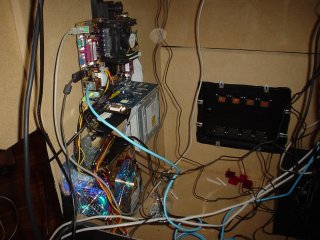
| This is the view inside the cabinet through the coin door. I mounted the power supply below the motherboard,
the DVD-ROM to the right. Notice that it's mounted sideways but the front is pointed so that you can put discs in through the
coin door. The hard drive is below the DVD-ROM. All devices are mounted with 2.5" x 3" L-brackets. So far, everything except
the hard drive feels really tight. I think I'm going to mark and remove the L-brackets, then bend them to fit each device. |
 |
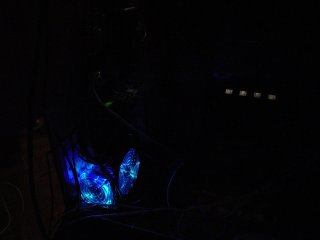 |
The power supply is too freakin cool. It has two LEDs that stay lit while it's on. |
| This is the view from the back. You can see the subwoofer at the bottom-right. Please don't judge the
wiring just yet, I'll clean it up later. |
 |